To gain a little better access, remove the air duct from the side door air intake. This is held on by only one bolt.
Ferrari 308 Water Pump Rebuild Procedure
By Matt Boyd
Please note that this procedure applies to my 1985 European Spec 308 GTS. Your car may be completely different.
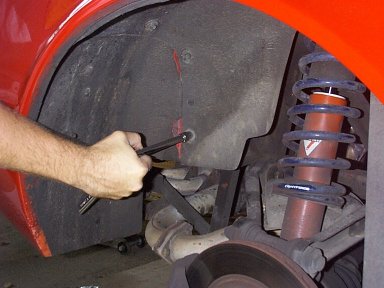
Removal of the water pump is easy. First jack up the rear of the car and remove the passenger side rear wheel.
Remove the inner wheel well by removing a few 10mm bolts.
To gain a little better access, remove the air duct from the side door air intake. This is held on by only one bolt.

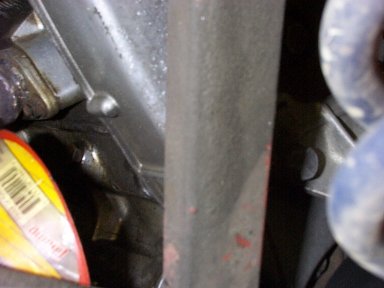
I spent a lot of time trying to determine the best way to drain the coolant to an acceptable level (below the water pump. I finally settled on removing a water jacket plug from the engine block. I used one on the rear of the engine. If you do it this way, be sure to have a funnel in place and cover up anything you don’t want to get splashed with coolant, because it will simply gush out. One thing that is important to cover up is the axle boot. I used some plastic bags to cover things up. The picture is less than perfect.
 .
.
Once you have drained a sufficient amount of coolant, go ahead and put the plug back in. To gain full access, remove the side coolant pipe that goes right in front of the water pump. You now have full access to the water pump and are ready to remove it.
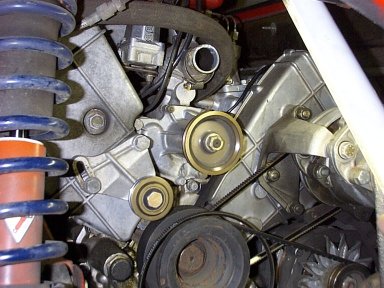
First, loosen the two bolts holding a belt tensioner pulley
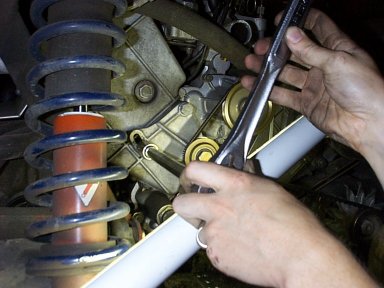
Remove the water pump belt.
There are a few bolts holding the water pump on, as well as some nuts holding it onto studs. Remove all these fasteners. I also disconnected the two upper coolant hoses that go to the housing the water pump mates to, and I removed the water pump and this housing as a unit. It was not trivial separating the pump from its housing, but with patience it can be done (or maybe yours will be easier than mine was). Just don’t use a screwdriver to pry between the two pieces.
Next we want to disassemble the waterpump. The disassembly of the water pump is drawn from my experience, as well as an old post by Carl Fung, and also by advice from Ric Rainbolt.
Remove lock from washer on acorn nut on impeller on rear of water pump.
Remove acorn nut from impeller with 2 washers
Remove impeller by gently prying up on edges and or gentle heating of impeller to expand metal against shaft
Remove 19mm pulley nut by torqueing against the 10mm square left on shaft by impeller
Remove pulley by tapping on pulley and or gentle heating of pulley.
Remove woodruffkey with pliers
Remove shaft by tapping with rubber mallet in the direction of pulley to impeller. I actually used a hydraulic press.
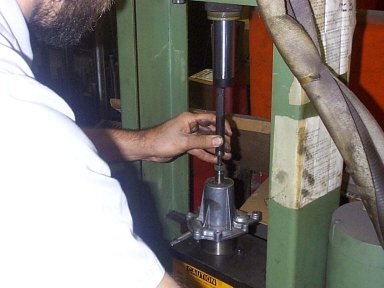
Note that the shaft presses out the rear of the water pump housing. As shaft backs out the water pump seal will pop off. You may need a punch indexed on the shaft center dimple to drive the shaft beyond the inner bearing.
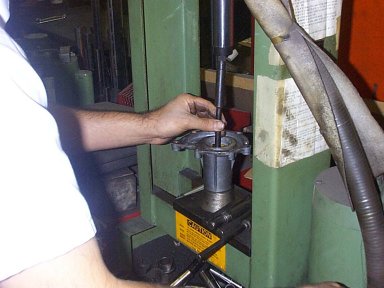
[Carl Fung’s approach] Heat the front part of water pump housing and let gravity cause the front bearing to drop out. It can be persuaded by using a punch, to move aside the "shaft spacer" remaining on impeller shaft removal, and driving the front bearing out in the direction of impeller to pulley.
[Matt’s approach] What I did was the following. Between the inner and outer bearing is the "shaft spacer." I tapped that a bit so it was askew, then used a hydraulic press to press the outer bearing (via the shaft spacer) out.
Use snap ring plier to remove the locking snap ring in the water pump bore. This was quite difficult, as the snap ring is deep within the housing.
Spring washer drops out on gravity.
Lastly, I pressed the inner bearing out using a hydraulic press.
Reassembly and reinstallation are reverse. Good luck!